Festive Feast: How to Create An Easy Christmas Charcuterie Board

simplenotsimple_style_step4
A delightful and easy way to prepare for Christmas parties -- charcuterie boards are a busy homemaker's dream

Don’t be intimidated by its name.

The word charcuterie (pronounced “shahr-ku-tuh-ree” or in true French tradition, drop the first r “shaa·koo·tuh·ree”) as described in Merriam-Webster is “a delicatessen specializing in dressed meats and meat dishes” and is literally translated into flesh (“chair”) and cooked (“cuit”).

Nowadays, a charcuterie board is basically an appetizer platter of cheese and cured meats (ham, salami, prosciutto etc.) plus some crackers, nuts, dips and fresh or dried fruits and veggies.

A charcuterie board is easy and fun to prepare especially during this Christmas season. Serve it during Christmas lunch with family or at a potluck with friends.

simplenotsimple_style_char3
Line up several charcuterie boards as individual stations for a savory and sweet spread of bite-size complements

There are no rules in styling your own board. You can even find some ingredients in your pantry and fridge or at your nearby convenience store.

In addition, the best thing about this is, you don’t have to cook, busy moms! Just put everything together and off you go to your Christmas potluck.

So, let’s get you started. Here are 5 simple steps to assemble your own board:

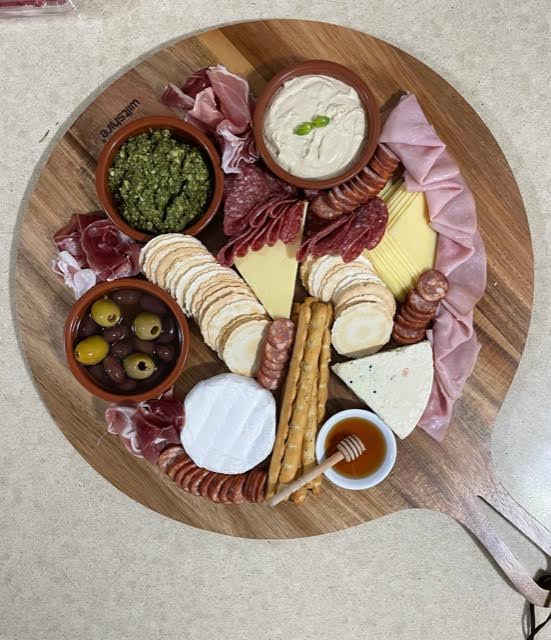
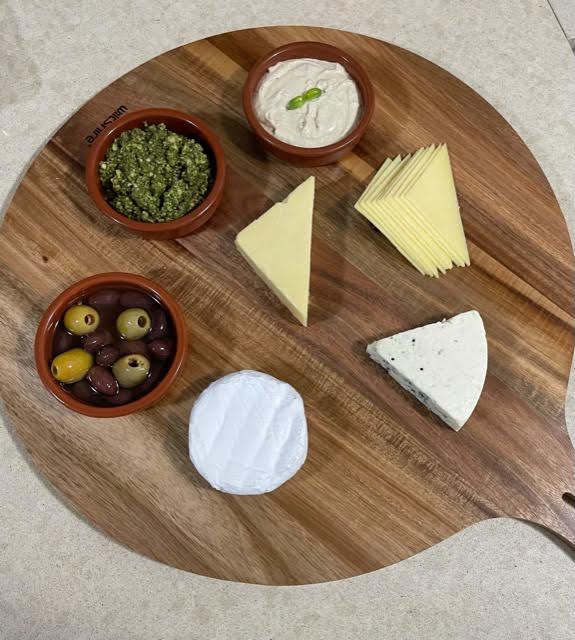
Step 1: Choose your board

You can present your mini-feast on a wooden cutting board or wooden pizza paddle board that you already have at home, any shape or size will do.  But keep in mind that the size of your board depends on how many people you will feed. Typically, a 12” round board could feed up to 10 people.

Once you’ve chosen your board, half the job is done. See? Easy!

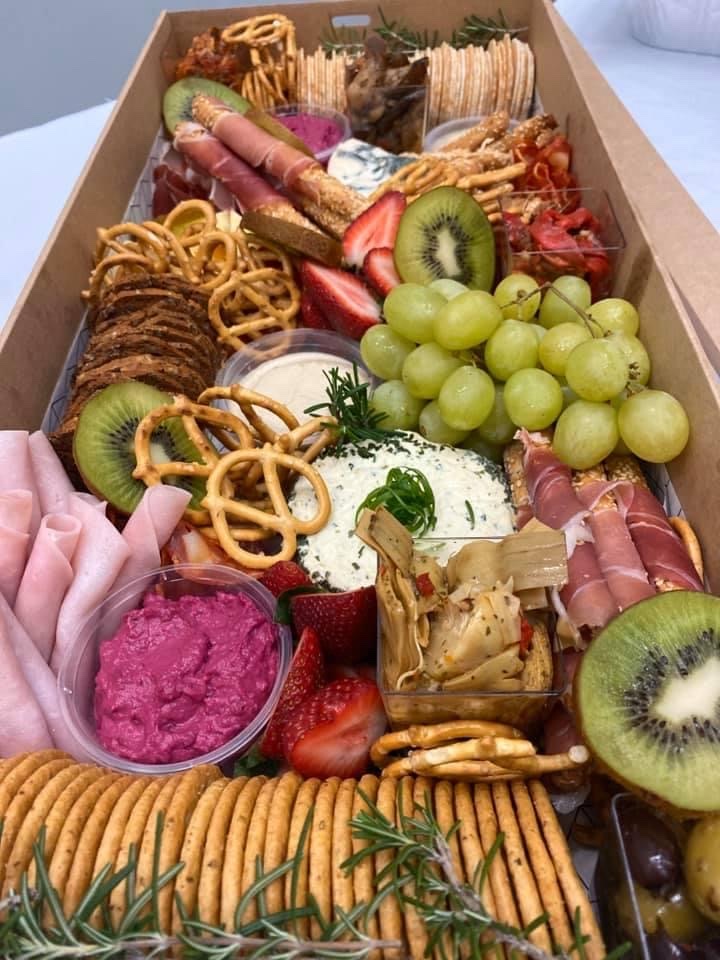
*Tip: For easy transport, place the contents of your board in a cardboard cake box (just call it a “grazing” box). There are some nice, sturdy kraft boxes you can buy in a party shop or at the party section of your grocery. They’re cheap too. Just line it with baking or parchment paper. Perfect if you need it to be portable and ready for your next picnic.

simplenotsimple_style_step1
A wooden board of any shape will provide the perfect stage for your festive feast
simplenotsimple_style_box
For easy transport, pack up the contents in a cardboard cake box lined with parchment paper

Step 2: Build on what you have

Find out what you already have by taking inventory of your pantry, fridge and herb garden.

Build around what you already have in stock– favorite biscuits and crackers your little ones snack on, that stash of nuts the hubby nibbles on while watching TV or fresh herbs growing in your garden to use as garnish (I picked rosemary from ours) – to get an idea of what you already have and what else is missing.

Doing this also helps keep you on budget and will prevent you from buying duplicates at the grocery. 

After-Christmas Tip: For an after-Christmas or New Year gathering, include leftover Christmas ham on your next board.

simplenotsimple_style_basil
Why buy when you can grow your own?
simplenotsimple_style_basilgarden
Check what's available in your own garden first: complete your list with homegrown herbs and veggies. Photo by Markus Spiske on Unsplash
simplenotsimple_style_closeupchar
Use your stock of household faves of crackers, nuts, and meats to get started

Step 3: Canvas for deals at your local grocery

Buy mixed nuts — they’re cheaper than buying individual packs. Also make sure they’re unsalted to keep them from competing with the salty meats.

Choose ingredients wisely by checking what are currently in season – fruits, veggies and other seasonal items will taste their best and sweetest then and will also be more economical.

Tip: If possible, plan ahead and buy cured meats in advance — it gets expensive around major holidays especially Christmas time.

simplenotsimple_style_nuts2
Choose packs of mixed nuts for more variety
simplesnotsimple_style_ingredients
In-season items are fresher and easier on the budget!

Step 4: Start assembling!

  1. Now that you’ve chosen your board and have your ingredients, you can start assembling by first placing your cheese. Ideally, 3 types of cheeses are a good mix — a soft one , semi-soft and a hard cheese. I like using blue cheese, Brie and cheddar. Spread them out on the board – blue cheese triangles, a Brie wheel, and sliced cheddar make the layout pleasing to the eye and more convenient for guests to pick up (and economical too, bite-size pieces feed more!). Tip: for a Christmas theme, add Edam cheese or queso de bola instead of cheddar.
  2. Place small bowls (or ramekins) of olives, nuts, and dips randomly on the board so they don’t look all lined up in one place.

  3. Neatly stack your crackers sideways and away from damp or cold ingredients that will make them soggy.
  4. Add your cured meats. Fold your salami, ham and prosciutto in half and arrange in an “S” shape to make it look appetizing and easy to pick up with serving tongs.
  5. Mix dried fruits with fresh fruits and fill in any gaps. Tip: add fruits last, right before serving, so they remain looking fresh. 
simplenotsimple_style_step1
Start with your cheeses first -- a variety of soft, semi-soft and hard ones are ideal
simplenotsimple_style_step2
Place small bowls with dips, olives, nuts and dried fruit
simplenotsimple_style_step3
Add crackers, bread sticks strategically -- away from wet or cold ingredients to keep them crisp
simplenotsimple_style_step4
Folding your cured meats in half and arranging them in an "S" arrangement make them easier to pick up and more attractive to look at

Make sure not to leave any space to make your board look abundant. Just use your creativity and imagination. Make it your own.

Step 5: Finally, make it festive!

Use fresh rosemary or basil leaves and style a wreath around your mini-buffet, add berries to make them look like holly. Use different colors and textures for that festive look.

Tip: Dress up your board according to holiday events or thematic birthdays or parties, add little blackboard signs or fun messages to your design, get creative!

simplenotsimple_style_char5
Design a wreath around your mini-feast with rosemary sprigs, basil leaves and berries to complete the Christmas theme

Note: Don’t be limited to savoury items only. A dessert Christmas charcuterie board can be filled with candy canes, chocolates, mini-pastries, churros and chocolate dip to treat the kids and kids at heart. Why not?!

There you have it, an easy-to-assemble charcuterie board that will definitely impress and satisfy your family and friends.

Advanced Merry Christmas!

Husband and wife team, Marvin and Noreena de Asis, are true foodies and enjoy creating dishes and feeding people with their tandem catering and cake businesses. Based in Sydney, Australia, Marvin is a full-time chef and owner of Marvin’s Catering while Noreena is a part-time early childhood educator and owner of Cake Haven.   

SHARE

Share on facebook
Share on pinterest
Related Posts