5 Tips and Hacks to Elevate Your Home Design (without spending a lot)

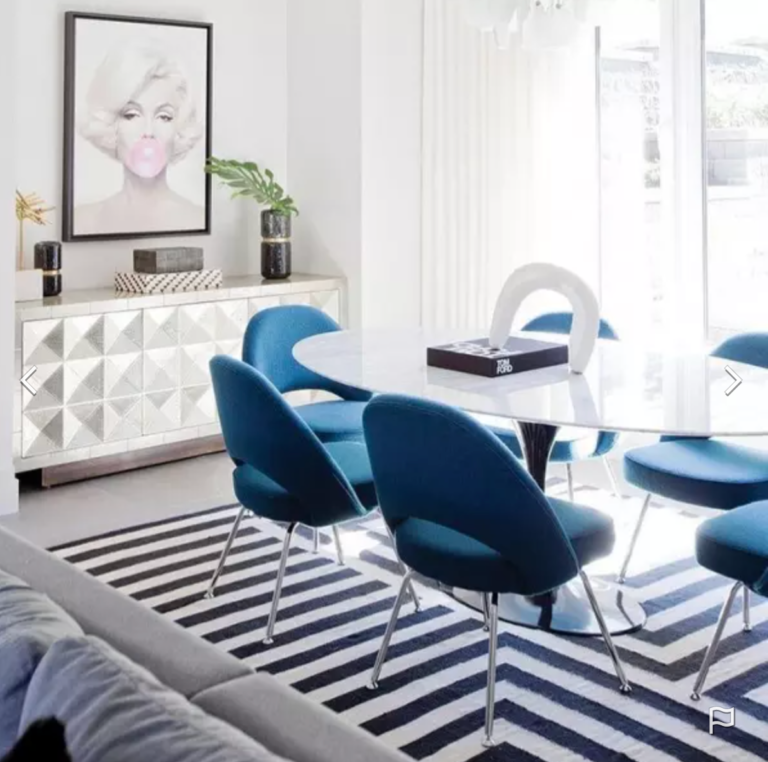
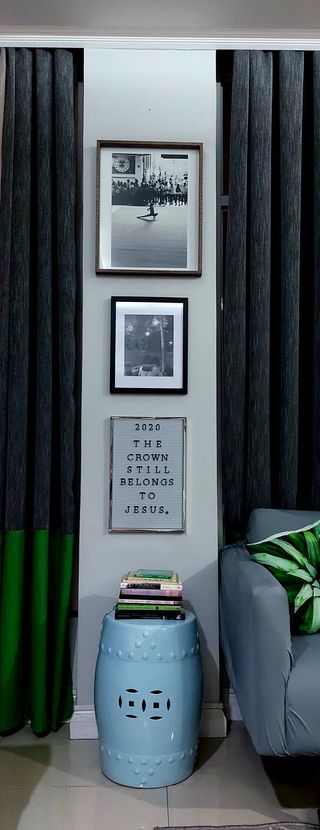
I’m not an expert. My degree comes from watching hours of HGTV (and a sprinkling of shows, reading design books and websites here and there) while breastfeeding, prepping meals and sweeping floors—which, when you think about it, add up to a LOOOOOT of hours. Multitasking-mommy level achieved! We’ve also moved so many times–two condos, one house and one townhouse and counting!—that I’ve had the chance to experiment and be bold on some designs (one attempt even made it to the cover of a home magazine *surprised happy, giddy dance*).

And on a small budget! (*happier, giddier dance*).

So, hopefully these tips and hacks from my own discoveries, lots of eureka victories and painful (I can’t believe I painted over that with water-based paint) mistakes over the years and, of course, eye-opening inspo from some of my favorite designers will help make your attempts more successful.

Because you know that feeling when you’re finally done? Oh-so-worth it.

1. Convert colored photos

Convert favorite colored photos to black and white and print them out on large scale. There’s something classy and timeless that happens simply by using the black and white filter (I clicked on the grayscale option on my phone for this one).

A larger than life copy mounted on your wall elevates the casual snapshot into a classic work of art! Choose lively action shots rather than stiff studio portraits as your next wall art for a more dynamic art gallery. Also try a series of framed photos (2 or 3 really big ones work well) on one wall for an instant focal point. For more ideas on DIY wall decor, click here.

simplenotsimple_style_home5
My phone snapshot became instant wall art! Scanned baby footprints also add to the black and white theme
simplenotsimple_style_home2
Experiment with the other filters on your phone! The cartoon and color select filters work well too
simplenotsimple_style_almario
Go bold and take inspiration from Atelier Almario's wall-to-wall black and white art gallery

2. Focus on one beautiful piece

Or one amazing collection and create an interesting vignette (an IG-worthy pocket in the room). Sometimes, all it takes is one riveting portrait, one dramatic houseplant, or one delectable collection to make a statement. Too many unrelated items and little abubots scattered around make spaces look cluttered.

Cluster similar items (with the same theme) together to create an appealing design feature. But remember to just choose your best ones! Spaces with too many attention-grabbing items usually bring down a room’s aesthetic and make for a busy chaotic impression.

The rule for beginners? KISS—Keep It Simple, Sister.

simplenotsimple_style_adler2
Jonathan Adler is known for his playful, quirky pieces. Take his lead and highlight one collection and draw attention to it (if you're an avid collector, pick your best one!)

3. Splurge on a few key accessories

Like throw pillows with luxe fabric or texture, an eye-catching area rug, or an amazing antique mirror in your foyer to elevate a room’s design without having to spend an arm and a leg. Invest in good quality big-ticket items like furniture and expensive art later on (but hey, if you can afford to buy one now, go for it and slowly build up your collection). For the meantime, cotton blend seat covers in muted neutral colors, affordable rugs and oversized beautifully framed family pictures will do the trick.

simplenotsimple_style_adler
An interesting area rug instantly makes the room come alive! What can I say? Adler rocks!

4. Attach floor to ceiling curtains

If you have handyman/woman skills, opt to hang curtains as high as they can go. This designer tip draws the eye up and gives the illusion of a higher ceiling which makes it feel more spacious.

Budget-friendly tip: Buy those Ikea curtain clips (I found similar ones at at Ace Hardware Store at SM) that have attached rings on one side and small metal clips on the other. These will give you the option of using bedsheets or fabric from the store as DIY curtains (which give more design options and could be more cost-effective too if your ceilings are not average height). Plus, these clips also make it easier to detach curtains on laundry day. No need to fumble with heavy curtain rods!

simplenotsimple_style_curtains
Our living room combo--floor to ceiling curtains and black and white wall art make an interesting vignette
simplenotsimple_style_rings
Ikea Syrlig curtain rings come with two attachments
simplenotsimple_style_rings2
Curtains with hidden pin hook attachments
Try using printed bedsheets or fabric from the store to make your own instant curtains

5. Choose the right paint

Opt for paint with eggshell finishes (although this admittedly gets dirty easily), a good option is a subtle satin finish which is a good compromise if you want a fresh vibe. From experience, this velvety finish is easier to keep clean and morphs from matte to a semi-reflective surface depending on the time of day and available light. Glossy finishes, unless done with an expert hand, can make a space look heavy and dated.

Tip: colors either recede or advance meaning they can affect how open and airy a space feels or how cozy and intimate. Generally, light subtle colors make small spaces seem bigger and less claustrophobic while darker, moodier colors can make a space feel more intimate and cozy. Study how you’re going to use the space you’re designing and decide if cozy (ie: reading nook) or airy (ie: living spaces, bathrooms) are what you’re going for.

simplenotsimple_style_home
A dark color made our small foyer more dramatic
simplenotsimple_style_gaines
Fixer Upper's Joanna Gaines defined the reading nook with a charcoal almost black shade and matched it with a predominantly white room

If you’re still unsure, a safe bet would be to choose a lighter color for most of the walls and a dramatic color for one wall. That’s what I did for our living area…I painted most of the walls a light gray and chose a dark, rich gray shade for the focal wall, ceiling and my daughters’ reading nook.

It worked pretty well, I think. It added a bit of dimension to the space and defined key areas.

simplenotsimple_style_gaines2
Be adventurous and try painting your space the way Joanna did it--starting with a bold color halfway up the wall spilling over to the ceiling! Now, that's a statement. Photo credit Jennifer Boomer for House Beautiful

So, whether this is your first attempt or the nth, the key is to enjoy the process and keep it simple…surround yourself with the things that make you happy and let the rest, be the backdrop. And don’t be afraid to be bold, you can always change your mind with these budget-friendly upgrades

So, go out there and start designing, mama! You can do it!

*Would love to see what you created in your homes too. Please share! 

SHARE

Share on facebook
Share on pinterest
Related Posts